Where would you be without your hands? Think of the countless things they help you do each day. Yet, your hardworking hands are probably the most neglected when it comes to beauty and skin regimens.
Have your hands aged prematurely? Famous and wealthy people may try cosmetic surgery on their face, neck, and body to disguise the effects of time, but there’s a limit to what can be done for their hands. When we try to lie about our age, the wrinkled skin on our hands will usually tell the truth.
You needn’t pay a fortune on hand care products from the department store, that may contain artificial colors, scents, and preservatives. Instead, why not do as your grandma did and use natural ingredients straight from your pantry? You can create luxurious creamy lotions to battle wrinkled skin and for softening dry, irritated skin.
Common Ingredients For DIY Hand Care Remedies
While some ingredients vary according to recipes, DIY hand cream, and lotions all contain natural moisturizes. These usually include oils pressed from plants or nuts, loaded with essential fatty acids that nourish your skin. Natural beeswax keeps the product more solid instead of runny.
Another beneficial ingredient you’ll notice is Vitamin E oil, which you can buy inexpensively in the skincare aisle. Vitamin E helps repair damaged skin and fight free radicals that can hurt your body’s cells. Other hand healing ingredients may include pure aloe vera gel and organic honey.
You can also give your DIY hand lotions a mood-lifting boost by adding your favorite food-grade quality essential oils. These are naturally antiseptic, antibacterial, and antifungal. If you have sensitive skin, the creams will work just as well without the essential oils.
Storing Your Hand Cream
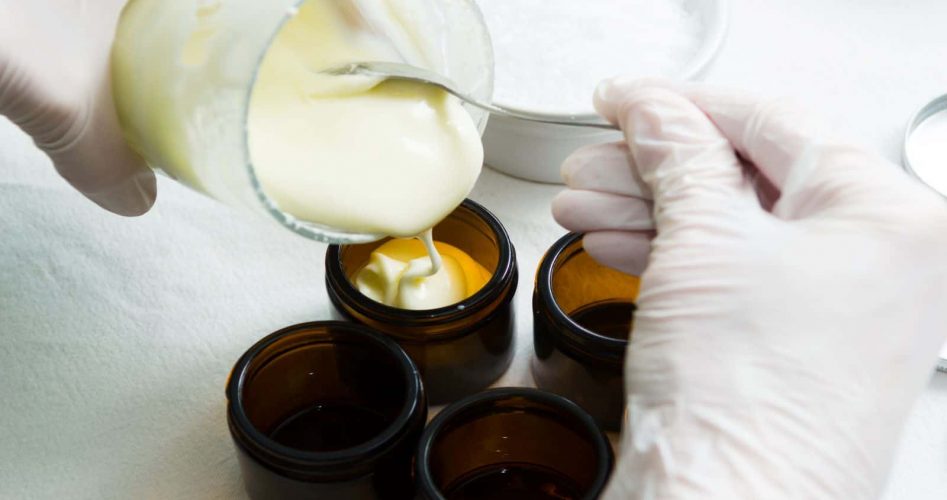
Unlike the lotions and creams, your purchase in the department store homemade versions don’t contain preservatives and have a short shelf life. Make DIY creams in small batches, so you use them up before they expire. Small glass mason jars are ideal storage containers for your lotions, and they should be kept in a cool, dry place.
If you have been diagnosed with moderate to severe skin disorder, talk to a dermatologist before using any homemade remedy on your hands. Read the ingredient list carefully and note anything that may cause you an allergic reaction. Some essential oils aren’t recommended for expecting or nursing mothers, so talk to your healthcare provider about which ones are safe.
Organic DIY Creams
Are you tired of fighting dry, itchy hands due to environment, eczema, or other skin issues? Pamper your hardworking hands regularly with a rich, fluffy lotion you made in your kitchen. Here are ten easy DIY hand lotions for you to try.
1. Hand Cream for Rough, Dry Hands
•Ingredients
·1/2 cup organic shea butter
·3 tablespoons olive oil
·2 tablespoons cornstarch
·10 drops of pure essential oil, if desired
Directions:
In the bowl of a stand mixer on medium-high speed, add shea butter and whip until fluffy like icing. Add cornstarch and mix again. While still mixing, drizzle in the olive oil, then stop and scrape down the sides.
Add essential oil and continue whipping until light and creamy. Spoon into a sealed container and store in a dry, cool place for up to six months. Rub generously on your hands when they feel dry, chapped, and sore.
2. Honey & Lavender Hand Cream
•Ingredients
·Quarter cup of sweet almond oil
·1/4 cup olive oil
·1/4 cup coconut oil
·1 tablespoon shea butter
·2 tablespoons honey
·1/2 cup organic beeswax pastilles
·5-10 drops pure essential lavender oil
Directions:
In a medium-size microwavable bowl, add oils, wax, and butter. Heat in the microwave for 1-2-minute intervals until the wax is melted. Stir until everything is incorporated.
Place in the freezer until slightly firm but still liquid in the center, about 2-3 minutes. Stir in honey and lavender until smooth. Spoon into a resealable container and keep up to three months, remembering to stir each time it’s used completely.
3. Light Hand Cream
•Ingredients
·1/4 cup shea butter
·1/4 cup coconut oil
·1 tablespoon pure aloe juice
·1 tablespoon olive oil
·5-10 drops of your favorite essential oil
Directions:
In a small saucepan over low heat, add shea butter and coconut oil and stir until melted and well-combined. Remove from heat.
Stir in aloe juice, olive oil, and essential oil. Pour into a sealed container and allow the mixture to solidify. Store up to three months.
4. Sunflower Hand Lotion
•Ingredients
·1 cup pure sunflower oil
·1/2 cup shea butter
·1/4 cup beeswax
·10-20 drops of essential oil, if desired
Directions:
In a double boiler over medium heat, add beeswax and stir until melted. Stir in shea butter and sunflower oil and continue stirring until incorporated. Remove from heat.
Add essential oil and stir until combined. Pour into a sealable glass jar and allow the lotion to come to room temperature. Cover and store up to 6-8 weeks.
5. Lemon-Fresh Lotion for Softening Hands
•Ingredients
·1/4 cup coconut oil, liquid form
·1/2 cup shea butter, liquid form
·1 tablespoon Vitamin E oil
·10-15 drops pure lemon essential oil
·2 tablespoon witch hazel
Directions:
In the bowl of a stand mixer on medium-high speed, blend oil, butter, and Vitamin E oil until smooth and fluffy. Add essential oil and witch hazel and beat until incorporated. Spoon into a sealable glass container and store in the refrigerator for up to three months.
6. Mint to Be Beautiful Hand Cream
•Ingredients
·1/4 cup beeswax, grated
·1/2 cup organic coconut oil
·1/2 cup pure aloe gel
·10-15 drops pure essential peppermint or wintergreen oil
Directions:
In a small saucepan over low heat, add beeswax and coconut and stir until melted and combined. Remove from heat.
Add aloe gel and essential oil. With a hand mixer on medium-high speed, whip mixture until combined. Set aside and cool for 2-4 hours, then beat again with the mixer until light and fluffy. Store in a sealed glass container for up to three months.
7. Soothing Orange Hand Balm
•Ingredients
·1/8 cup beeswax, grated
·Quarter cup of olive oil
·2 tablespoons shea butter
·20-30 drops pure essential orange oil
Directions:
In a double-boiler over low heat, add beeswax, oil, and shea butter and stir until melted and combined. Remove from heat.
With a hand mixer on medium-high speed, add orange oil and beat until smooth and creamy. Store in a sealed glass jar up to two months.
8. Vanilla Clouds Hand Lotion
•Ingredients
·1/2 cup sweet almond oil, in liquid form
·Quarter cup of organic coconut oil
·1/4 cup beeswax, grated
·1/4 cup shea butter
·2 tablespoons Vitamin E oil
·10-20 drops pure vanilla extract
Directions:
In a double boiler over low heat, add almond oil, coconut oil, beeswax, and shea butter and stir until melted and combined. Remove from heat.
Stir in Vitamin E oil and vanilla extract until smooth and combined. Pour into a sealable glass container. This lotion is shelf-stable for up to six months.
9. Old-Fashioned Oats & Honey Hand Cream
•Ingredients
·1/4 cup old-fashioned oats
·1 cup filtered water
·1/2 cup olive oil
·1/8 cup beeswax pastilles
·2 tablespoons Vitamin E oil
·2 Tablespoons organic raw honey
·10-15 drops of your favorite essential oil, if desired
Directions:
In a small bowl, combine oats and water, cover, and set aside on the counter overnight. Drain and reserve water and save oats for another use. Save ¼ cup of oat water and set aside.
In a microwavable glass bowl, add olive oil, coconut oil, beeswax, and honey. Microwave at 1-2 intervals until completely melted. Stir and refrigerate for about 45 minutes.
With a hand mixer on medium-high speed, add reserved oatmeal water and essential oil and whip until smooth and creamy. Place in a sealed glass jar and keep in the refrigerator for up to six weeks.
10. Cozy Spice Hand Butter
•Ingredients
·1 tablespoon beeswax pastilles
·2 teaspoons organic shea butter
·1/3 cup sweet almond oil
·15-20 drops pure Vitamin E oil
·1/2 cup distilled water
·3 drops pure essential ginger oil
·4 drops pure essential clove oil
·4 drops pure essential cinnamon leaf oil, not bark oil.
Directions:
In a double boiler over low heat, add almond oil, shea butter, and beeswax. Stir gently, until combined, and remove from heat. Set aside to cool, about 10-15 minutes. Stir in Vitamin E oil and essential oils.
In the pitcher of a blender, pour the mixture and refrigerate until thickened but not solid, about 20 minutes. Attach pitcher to a mixer and set at low-medium speed. Slowly drizzle in water then increase speed to high for up to 20 seconds. Pour into a sealable glass jar and keep in a cool, dark place. Use within six months.
Final Thoughts on Making DIY Hand Cream for Softer, Ageless Hands
Show your hands how much you appreciate them and moisturize them generously with these simple DIY creams and lotions. These recipes also make the perfect homemade gift for friends and family. Instead of dry, flaky hands, enjoy the soft, healthy ones you deserve.
